Time for an overhaul of my 1.9 '98 BMW Z3 Individual

Matt Barnes

Zorg Guru (III)
Supporter
British Zeds
Joined
Jul 18, 2020
Points
128
Location
Portchester, Fareham
Model of Z
1998 BMW Z3 Individual 1.9 M44 B19
Ok so it's the weekend again !....... ok top domestic news.... I fixed the washing machine !!.. :party: .. ended up being a new sump pipe and new pump. (total cost about 50 quid and lots of swearing) Now purrs like a kitten and pumps water out stronger than Linda Blair in the Exorcist.....

right.. so with a happy wife...let's get back to the Z3 !!

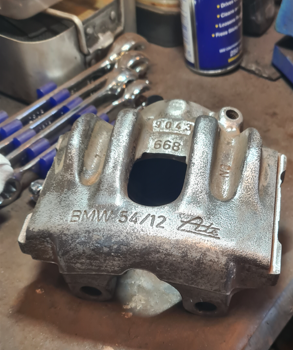
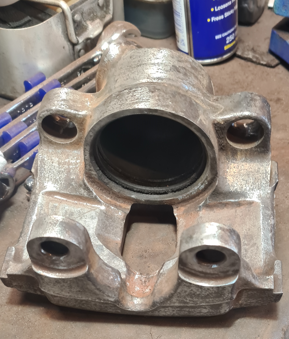
Focus today was on front Calipers.... so it was lots... and lots.... and lots... of grinding rust and other detritus off the surfaces.

used a wire pipe brush for the piston bore and the slider and bolt holes...

1760793958619.png
1760793999669.png


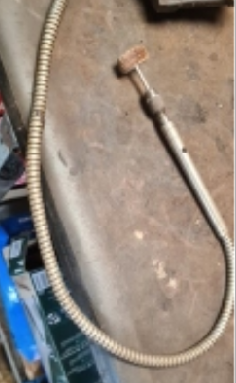
although it worked well, it was a little too rigid, so I then dug out my drill flexi attachment.. but, screwed it into the pillar drill instead of a hand drill, this enabled me to have both hands free..

1760794143911.png
1760794163098.png
1760794221054.png


If you use barrel sanders on a Dremel, one little tip I can offer is, don't push the sanding tube all the way down on the rubber barrel. Leave it slightly overlapping and that way, the top of the sander is more flexible and can get into more nooks and crannies..

1760794511548.png


Then it's into the paint booth ! =))

1760794579767.png
1760794607409.png


1760794644909.png

1760794674745.png


that'll do for now, and tomorrow I'll do the other one
 

Attachments

AntStark

Zorg Guru (III)
Supporter
British Zeds
Joined
May 15, 2021
Points
143
Location
Hampshire
Model of Z
2002 3.0 Sport
I used one of these to do mine and the carriers..it’s the equivalent of 80 grit and gets in all the little corners really well
IMG_0596.jpeg
 

Matt Barnes

Zorg Guru (III)
Supporter
British Zeds
Joined
Jul 18, 2020
Points
128
Location
Portchester, Fareham
Model of Z
1998 BMW Z3 Individual 1.9 M44 B19
Weekend again !... and unfortunately I only get one afternoon as tomorrow I have to rip the spare room apart ready for a sparky to come in next week..... :whistle: :whistle:

right...let's get to it....

First thing, received new hub bearings from AutoDoc

1761403305768.png


Then I thought I'd attack one of Ant's calipers.... using my socket trick, the piston just would not budge, that bad boy was in there. No matter how much I twisted, it just wouldn't budge

1761403427132.png


Then I tried something that freed it up straight away !... ok there was also liberal squirts of WD40 but.. I found if I gave the piston a tap with the extension bar and hammer, it freed it straight away... just a sharp bang on opposite sides should do it....

1761403546993.png


This is the combination of sockets I used that enabled a 1/2" extension bar to jam in tightly.. 8mm, 13mm and a shouldered 11mm, with 1/2" bar.
Then the piston started to spin....I got it out halfway and then it got stuck

1761403762636.png


.... but as I knew it was moving, I then tried the foot pump trick with a bouncy ball adaptor, few pushes and .... BANG! out it flew :party:

1761404310928.png
1761404351596.png


Then it was just endless, endless grinding with a variety of flap wheels, drums, wire wheel and stones...

gave it a good dose of brake cleaner and it's ready for paint

1761404619146.png
1761404639522.png


with that done I had a go a dry fitting the front left shock

1761404708785.png

1761404728246.png

1761404759693.png
1761404900749.png


I was quite surprised how far up the shaft the hub bearing started to become an interference fit. Granted it was dry with no copper grease, but I hope when greased that will hammer down to the bottom !

1761404875269.png


So that's it for today... looks like I can't do any more until next weekend !
 

Attachments

Matt Barnes

Zorg Guru (III)
Supporter
British Zeds
Joined
Jul 18, 2020
Points
128
Location
Portchester, Fareham
Model of Z
1998 BMW Z3 Individual 1.9 M44 B19
well... here we are again......house won again as two rooms needed the floorboards lifting so the sparky could run a new immersion cable. Only possible explanation could "rodent damage".... anyway back to Z3s again

with my brief tenure in the garage, I fitted the dust shield permanently with the zinced grub screws.... all that effort to zinc them I think was worth it.

1762008944816.png


Got ready to paint the caliper carrier but first cleaned out the threads with refreshed bolts. It looks black because I had it sat in Evapo-rust for a week, before cleaning

1762009061917.png


Prior to paint I filled the threaded holes with tissue paper and employed a little trick my Dad taught me in the 80s. If you don't want paint to adhere to something (i.e. mating faces) then smear it with a little grease. The paint will then wipe off.

1762009203276.png


et voila ...one caliper carrier done

1762009245841.png


Now it's serious time.... drifting on the new Hub bearing.... picked up a tip from YouTube in that one guy used the race from the old bearing to act as a drift..... here it neatly fits in an old axle stand pole

1762009389940.png


I didn't actually photograph it in action which is annoying, but you get my drift... =)) =)) . used a big rubber mallet and gave the top of the pole several decent love taps (having previously applied LM grease to the hub). After a while you hear a change in tone as it slowly moved down... until it bottoms out..that's enough thread exposed to get the new nut on...

1762009566886.png


and that's as far as I got...just need to rinse and repeat on the offside....

1762009666853.png
1762009688750.png
1762009724087.png

1762009766686.png


mooooooooooooo =))

1762009808045.png
 
Top